


And here we are, with our new calendars on the first page, with new energy and hope for a better future. 2 0 2 4 seem to be promising numbers, and I believe that the coming year will be much better than the previous one.
I wish you, my dear readers, peace in your hearts, sparkle in your eyes, persistence in realizing your dreams and strength in shaping this world into a better place for your loved ones, the people around you and for yourself.
It has been a long time since I made any summaries or plans at the turn of the year. In 2024, I want something different; I am going to prepare my own New Year’s artistic to-do list.
Although in my studio I use variety of materials including ink, paints, wood, metal, clay and glass, this list will be focused on projects made of fibre. I want it to be a range of fibre types because I like shifting from one technique to another, taking advantage of variety of content types, structures, and textures.
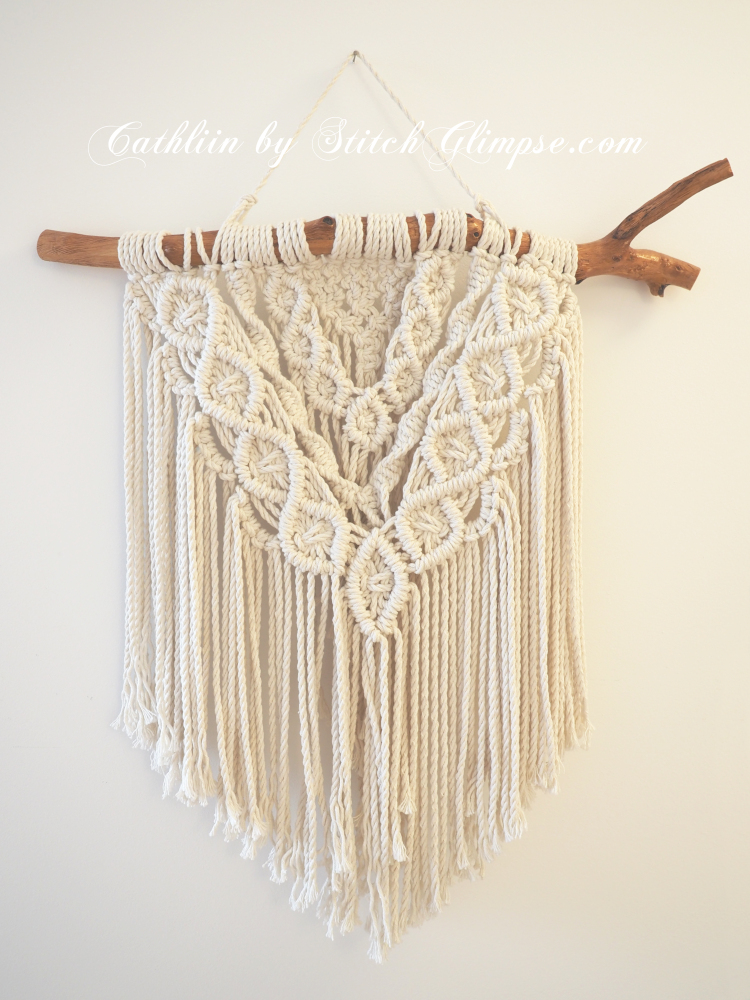
Five years ago, after a long break, I returned to making macramé. One of the projects was a flowerpot hanger that I wanted to use on the balcony of my art studio in the summer. Then I made a three-dimensional macramé wall hanging based on the Made in May tutorial. It has been my favourite home decoration since then.
Macramé is naturally three-dimensional, but this particular pattern, through the way it is designed, creates four layers, each at a different distance from the wall. Additionally, I hung it on a curved stick and twisted the top loops to enhance the effect of visual depth in my knotted creation.
This macramé was easy enough to make that I did not get discouraged while working on it, yet it was complicated enough to keep me interested in knotting and enthusiastic about the emerging cotton sculpture.
This is one of the reasons why I adore macramé, its mystery hidden in between twisted cords and simplicity of basic knots that can be transformed into energetic forms.
When I learned macramé as a teenager, the cord availability on the market was pretty limited, but when I completed my three-dimensional macramé wall hanging, and searched the Internet for more resources, it came to my big surprise that there were so many materials to use and tons of useful tutorials to gain from. I bought macramé cords with different twists, colours and thicknesses and planned several new projects.
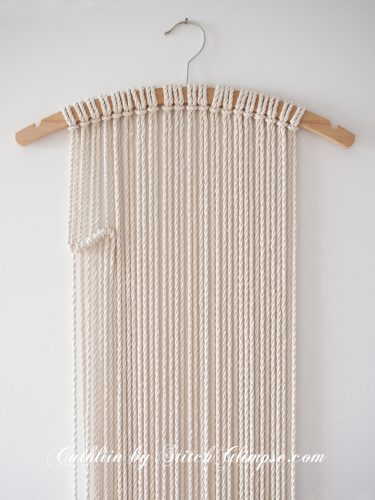
One of them was a decorative letter holder that I wanted to hang inside the house, near my front door. I started working on it, measured and cut the cords, arranged the loops and even made several knots but then I needed to put it aside and has never had time to return to it.
It is a macramé with a pocket for all the letters and bills that I never know where to put when I come home with my hands occupied with a purse, shopping bags, keys, you name it. By now, I have a decorative key hooks (with a piece of macramé on it, of course) but the letter holder is still waiting for its turn. I want to finish it as soon as possible because it looks really pathetic with those several knots sitting there alone.
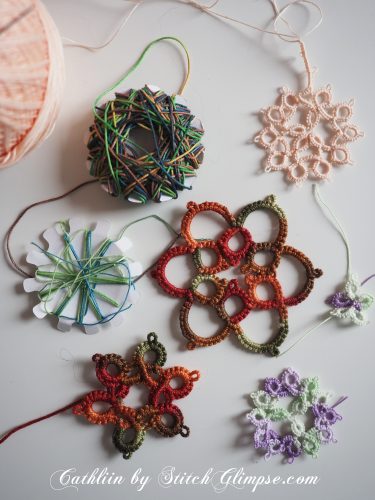
Since I am writing about cords, let me jump to the other side of the rainbow and dive into my needle tatting projects. Recently, I have become a delighted owner of an amazing range of Japanese threads for tatting. Some of them are in beautiful, vivid colours and some other, which make up most of my stash, are variegated threads. The latter are my preference; they add another level of visual feast to already mystically intricate tatted items.
I still have some tatted gifts and orders to complete, but my thoughts already fly around new designs. Although my favourite items to tat are bookmarks, I have been experimenting with other types of decorative elements such as bracelets, earrings and doilies, and I hope to come up with some new designs that I could share with other tatters.
Tatting has been present in my life for more than 10 years, yet it still amazes me how different are the results when I make the same pattern with thick and thin thread. I am glad that there are still many advanced techniques to learn for me. Now, with the new threads in my stash, I feel like I have new wings to fly to undiscovered places of tatting world.
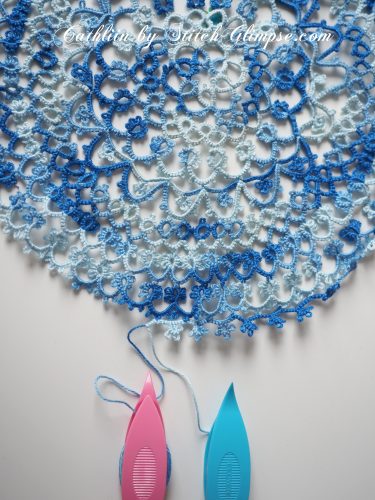
Although needle tatting was the first tatting technique I learned, shuttle tatting is as interesting for me as working with a tatting needle. I even started to learn how to tat with two shuttles.
Here is my first large doily still in progress (a fairly large project compared to bookmarks of any kind). The thread I have been using is not of the best quality because it splits and does not allow for fixing mistakes, but I keep my open-minded attitude and treat this project as a learning opportunity. This design comes from a Tat-a-Renda, and I hope to try more of her tutorials to improve my skills in this fascinating technique.
Once it is completed, I will block to a good-looking shape and either use on my dining table or as a decoration. Maybe in a wooden frame?
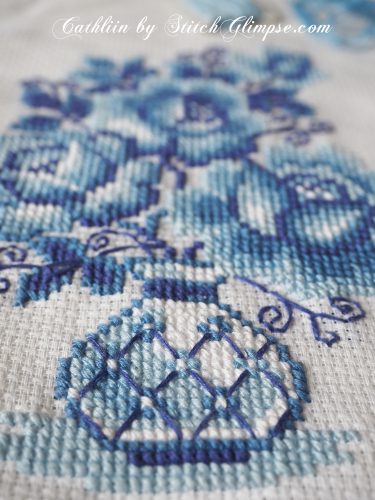
Staying within the blue-thread theme, there is this cross-stitched vase with flowers that I almost finished several years ago, but it still needs some final touches. This is not 100% cross stitch because I used the ‘half-stitch’ technique, that I learned from my Grandma. This is my tribute to all the crafts She taught me.
When I started working on this piece, I just wanted to complete it according to the picture in the instructions and frame it. Over time, I thought I would turn it into a cover for my cookbook. I spent a lot of time creating a digital template for a recipe page and polishing up my notes on family recipes… until my laptop with all the files on the hard drive stopped working. Of course, the Murphy’s Law applies in such situations; since I did not save my files anywhere else, all my work was gone. Now, I need to write those recipes again. Fortunately, I still have some handwritten notes and remember most of the updates I made in those recipes over the years. I feel a bit disheartened by the loss of the files; on the other hand, I know that the second version of all the pages will be better than the first one. It seems that I will have the cross-stitched cover ready first, though.
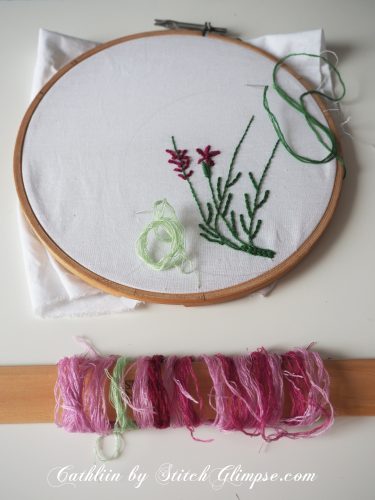
Several months ago, I joined a group of people who meet at one of our local museums to learn about various crafts. The last meeting was dedicated to embroidery, which I was familiar with but had not made for years. We could choose whatever theme we wanted. I decided on a small round decoration with lavender flowers. Nothing fancy, just to practice basic stitches.
It is such a relaxing activity, but I still find it intimidating. I want to finish it, though, to refresh this experience. Perhaps at some point I will be able to incorporate the stitching technique into my knitting or weaving.
On a side note, I recently saw photos of small magnets that can be attached to embroidered fabric. They are used to keep the needle in place and prevent loosing it. This is such a natural and obvious solution, especially since I use the magnetic bowl for sewing (to keep pins and needles in it) and for light woodwork (to keep nails and screws). I think I will use it in my weaving from now on as well.
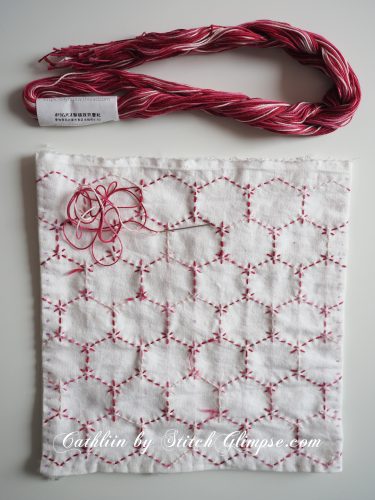
My latest discovery is sashiko. I fell in love with this phenomenon immediately. By now, I have read several articles about history of the Japanese art of mending, gathered needed materials and started my first sashiko hanafukin.
Unfortunately, I do not have access to Japanese sarashi, but I have purchased cotton textile locally, which is of a better quality than the one I use for the test shown in the picture here, and I hope to move on to the next tests using a more suitable fabric.
What I already love about sashiko is the wisdom of the Japanese who, using centuries of their experience, have developed ergonomic methods of working with a sewing needle, natural to the human hand. Although I had never tried shashiko before, the moment I picked up the shashiko needle, I immediately knew how to gather the fabric on the needle and how to rest the needle on the thumb thimble.
Once I finish this Tortoise Shell hanafukin, I will work on a face towel and tea mats with traditional Japanese sashiko patterns.
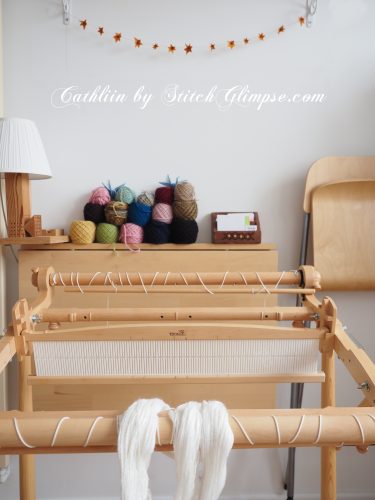
I would not be myself, if weaving was not on my New Year’s artistic to-do list. My beautiful rigid heddle loom has been abandoned for way too long, while there are so many techniques to learn and practice. In addition to practicing weaving with consistent number of picks per inch/centimetre and keeping straight edges in my projects, I wish to get closer to two-heddle weaving and double-width weaving.
I also want to try making weft-faced fabrics, including tapestry. My little dream is to have a tapestry frame so I could work on smaller projects with a mix of techniques. I envision using all the test spins and left overs from my knitting, spinning and weaving projects to create small fibre images with variety of textures.
The other day, I read about weaving on a tiny frame. That brilliant idea made me think of using such a frame in my design process, where it could work in the same way that a pencil sketch works for my watercolors or pastel drawings; it could be a weaving diary, a 30-minutes project becoming a note to myself. This is something I want to try this year.
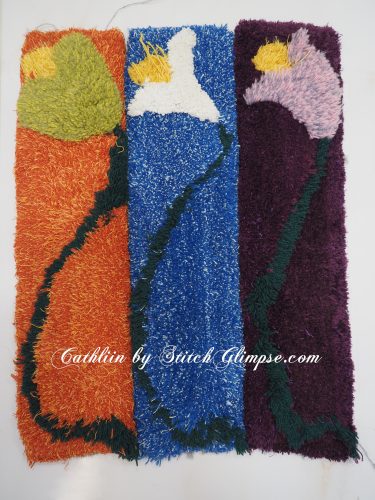
There are some projects that I did a really long time ago. I made these three vertical rugs with a tufting gun in 2006 during my art studies in Finland. I was given the opportunity to use the textile workshop for free, so I self thought myself about how to use the tools and worked on a few draft pieces to find out which yarn to choose for which part to get the effect that I liked. It took me a while to get the result I wanted, but once I was done, the rugs turned out perfect.
There was a lady in the textile dyeing department who showed me how to properly secure the back sides of my tufted rugs. Thanks to that, all those wooly creations survived my moving from country to country, and are still with me in perfect shape. Now, I would love to come up with the best possible idea for displaying these, either together as triptych or slightly apart, with some decorative element on one of the walls at home. They bring so many good memories that I feel it is worth having them in sight, just in case I need a heart-warming thought.
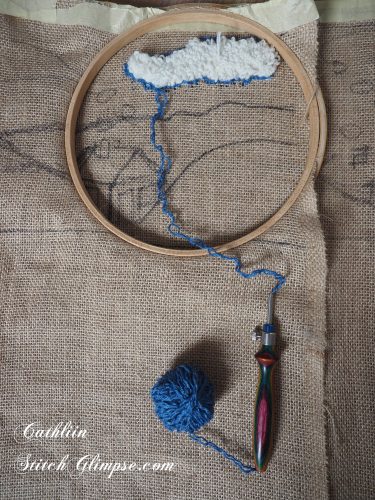
Punching needle is my new fascination. I read that my grandmother’s generation knew and used this technique but I never got to learn it. I did not even know that we had punching needles available in stores. What I found out though, was that the technique used to be called looped embroidery.
While I am waiting for my monks cloth and panama cloth to arrive, I bought myself some jute and started practising. I am planning to make window sill covers for winter days. For the first piece, I drew an image with small cottages scattered on snow-covered hills. The second piece is either going to be a continuation of the first, so the two pieces will be a set, or I will make a different drawing with winter scenery.
I also dream about making a large cushion cover and cushions of chairs by our dining table. For those projects, I will need to come up with a special frame to properly stretch the clothes. My notebook is already full of sketches for my unique modular stretcher. So exciting.
Clearly, there are some intriguing and fascinating days ahead of me this year in my art studio.
I hope this article has inspired some of you to dive into a new technique that you have never heard of or perhaps to reach of for that WIP that has been sandwiched between some old newspapers waiting for your kind eye (I am not sure if anyone reads newspapers these days any more but I imagined it would sound old enough for a forgotten WIP).
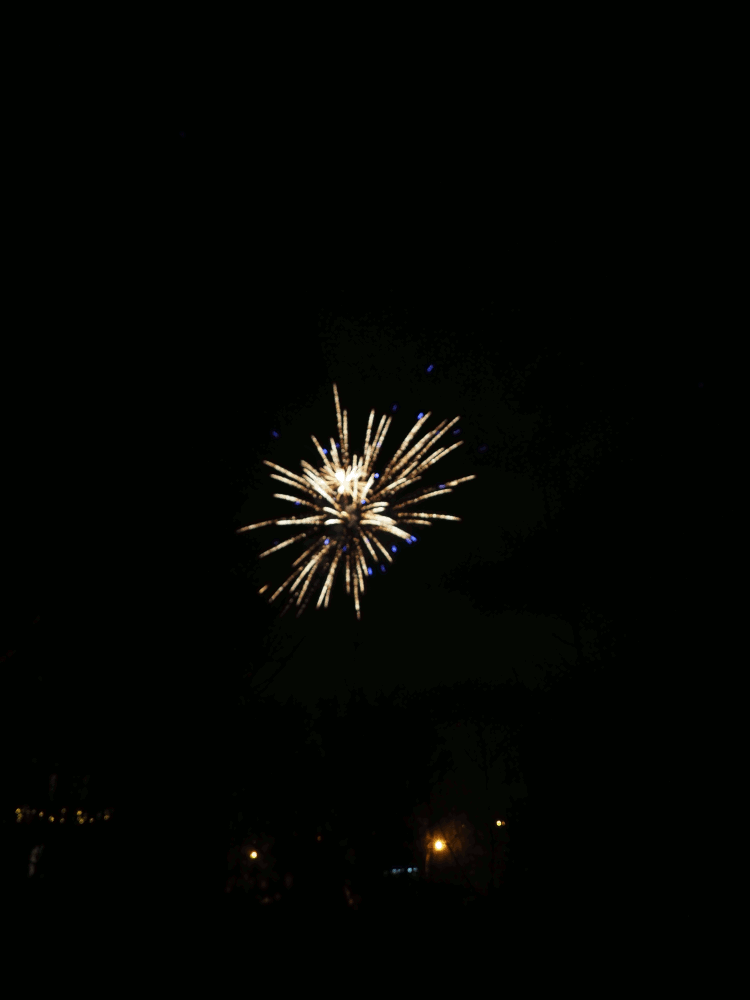
Here is a tiny bit of the New Year’s atmosphere from my celebration: our neighbours prepared breathtaking fireworks, and I snapped several photos catching the moments.
Have an amazing year ahead, dream and create for a better life, improve yourself and share the joy. All the best your way,
~ Cathliin
Leave a Reply