

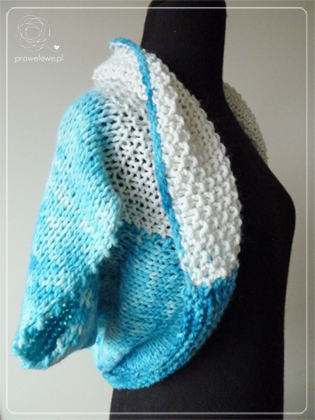
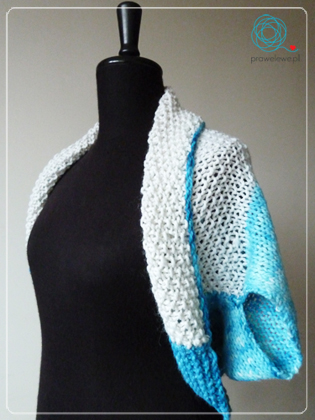
Finally ready! This was a long journey! Blankets, shawls, haps… they are all fine but I have always wanted to have a shrug. Squishy, just about the right size, something to put on my shoulders when at home in the evening. Like this Teal-Snow Shrug.
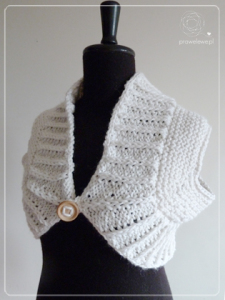
But it took me a long time to get to this point! For reasons that remain mysterious to me, I wanted to use an already-existing pattern and around two years ago I found that cool-looking one with thick ribbing in the chest area and a place for a large button. I bought the exact yarn the pattern called for and knitted as stated in the instructions hoping that all will go smoothly.
Unfortunately that shrug did not fit at all! I tried changing certain parts, frogged three times and knitted in different sizes… this was not it. It looked nice on my mannequin though. And I liked the wooden button! I kept this snowflake warmie, as I called it, for a while but then decided to frog.
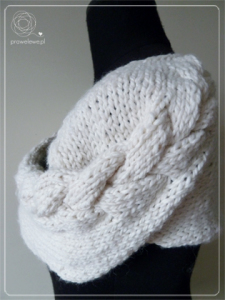
My shrug project was snoozing until half year later, when I found another pattern that seemed to fit me. I chose it based on the finished project photo but again, it turned out to be something I needed to redesign because the shrug did not sit on my arms firmly, and while some parts were too big, the sleeves where much too tight. Ugh! At least, I came up with an idea for that squishy cable element and made some good notes on how to incorporate it in a plain fabric so this part might be of some use in my future projects.
As you can imagine, I got a bit frustrated with all those not successful FOs but I did not want to let this shrug idea go. In November 2014, I found a pattern in Danish and I thought I would give my dream one more try.
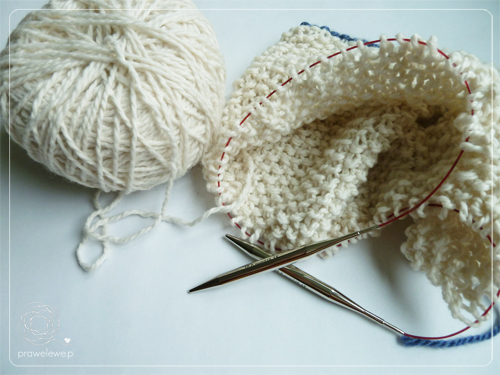
From the first knit of the first shrug version, I kept using the same white yarn, and I only hoped that it would survive so much messing around. Luckily it did just fine.
When I finished the seed stitch part I thought it would be nice to have the rest of the shrug in some other colour. I had almost one fourth of the project done–and since I re-knitted this shrug several times, I already had all the skeins joined into one huge centre-pull ball–so I could either break the yarn, dye the remaining skein, join it and knit on OR …
…it took me less than an hour to make my mind. Pot, dying bath, cake inside and let the teal blue do the work. I love cake dying for its unpredictability.
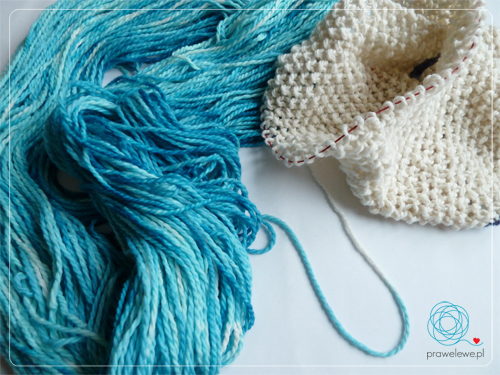
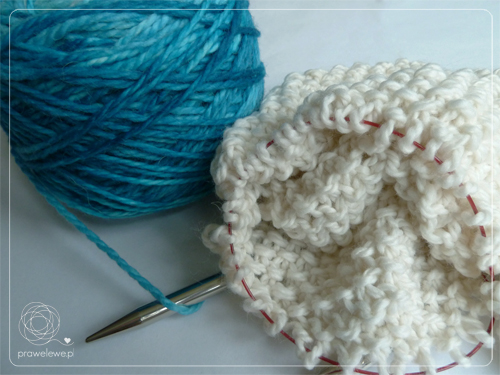
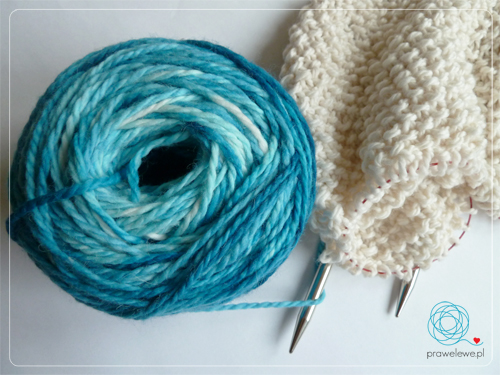
Smile kept brightening my face while I was stretching the dyed yarn to dry. In the morning it was all ready, simply perfect. I wound it quickly and knit the rest of the pattern. Here is the teal landscape during wet blocking:
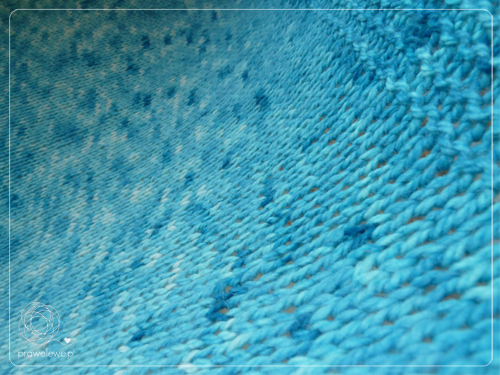
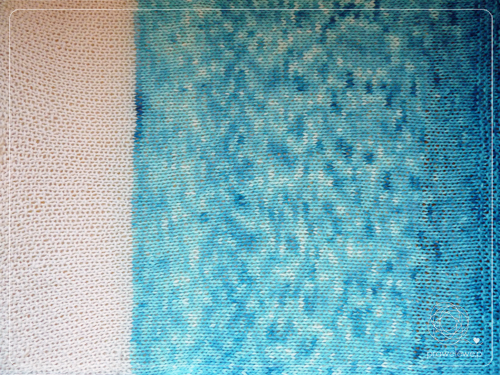
It was such a pleasure to knit in my brand new teal yarn. Variegated yarns are amazing! And to show the yarn colour even better I made couple of changes to the original pattern with the following result:
My version of the pattern is based on the Elisabeth Kruse’s instructions published in Danish here. If you wish to use my notes, here they are in English with all the changes included.
TEAL-SNOW SHRUG
PATTERN
difficulty 1/5
MATERIALS
Andes by Drops, (65% wool, 35% alpaca, 5 wpi),
yarn parameters: 96 m / 100 g (105 yd / 3.53 oz)
YARN AMOUNT
approx. 75 m / 82 yd of natural white
approx. 235 m / 257 yd of kettle-dyed blue
GAUGE
8 sts x 14 rows per 10 x 10 cm / 4 x 4 in (after wet blocking)
knitted flat in stocking stitch with 10 mm / US 15 / UK 000 needles
TOOLS
10 mm / US 15 / UK 000 interchangeable circular needles
(Alternatively, one pair in each size with 100 cm / 40 in cord.)
10 mm / N/P / UK — crochet hook
NOTIONS
scissors, tapestry needle
4 m / 4 yd of a thick scrap yarn for provisional cast-on
SAMPLE INFO
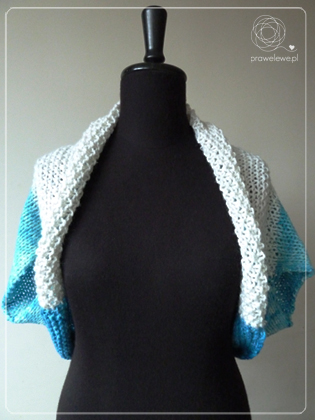
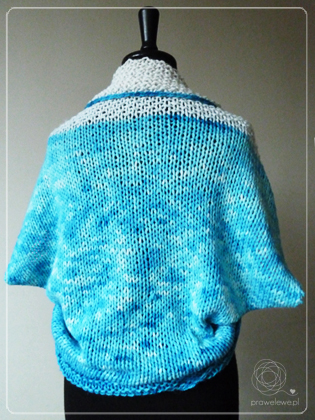
size of the blocked rectangle: 80 x 100 cm (31 ½ x 39 ⅜ in)
After sewing, it is a loose garment and it will fit any person wearing M or L size. Adjusting the size of the basic rectangle will change the sizing of the finished garment, thus any size is possible to be made based on this pattern.
CONSTRUCTION
Knitted in one piece as a rectangle, joined with side seams into the final shape and then finished with crochet edging.
This shrug requires blocking.
CREDITS
This is my version of the pattern by Elisabeth Kruse published in Danish [here][1]. My version is modified in areas of: stitch pattern, size, materials and tools used, as well as language and form of instructions. I offer the pattern for free as a contribution to Elisabeth’s work.
TECHNIQUES
see my photo tutorial on provisional crochet cast on
seed stitch – *k1, p1* for RS and *p1, k1* for WS
stocking stitch – knit on RS and purl on WS
garter stitch – knit all stitches on RS and WS
abbreviations are explained in the dictionary
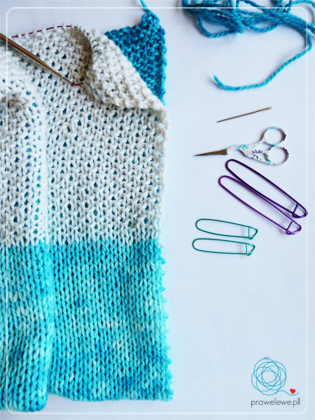
Using 10 mm / N/P / UK — hook, make a provisional crochet cast on for 65 sts (i.e. chain 70-75 and pick up 65 sts leaving several chains free on both sides).
Using 10 mm / US 15 / UK 000 needles, work in seed stitch until your knitted piece measures 25 cm / 10 in from the cast on edge, then change the yarn (optional) and continue in stocking stitch until you reach the length of 95 cm / 37 ½ in.
Next work in garter stitch until your work’s length reaches 100 cm / 39 ⅜ in.
Finish on the wrong side. Turn and loosely bind off all the stitches.
Go back to the provisional cast on, remove the crocheted chain, put all the life stitches on your needles and bind off loosely.
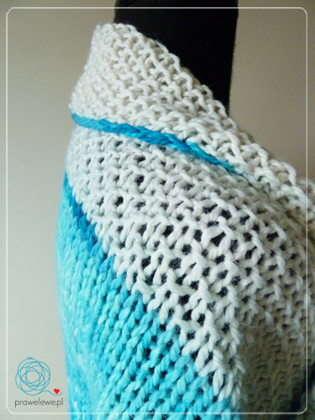
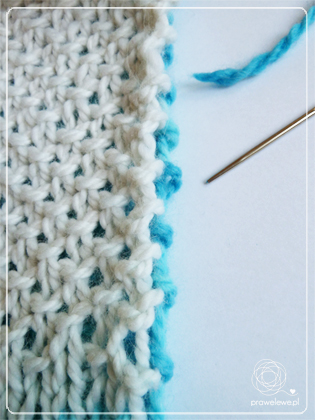
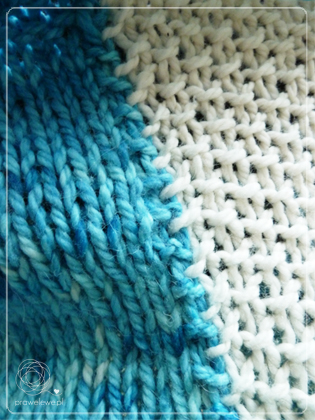
You may wish to use a contrasting colour for the bind off like shown in the pictures.
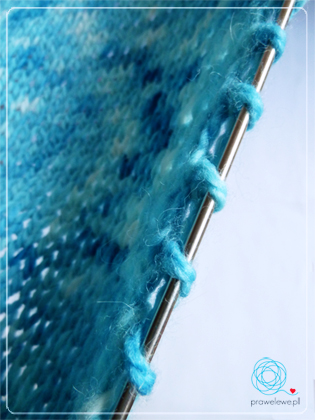
Leave your finished rectangle in a bowl with warm water for a while. Squeeze gently, wrap in a large towel and squeeze excess water. Lightly stretch this wet piece to the size you desire and leave to dry. I used thick wires to block the rectangle and this is how I got the nice looking even loops on the sides.
When your rectangle is ready, fold it in half so the shorter edges come together at the top, leaving open parts on both sides. Beginning from the top, i.e., where the two shorter edges are lined up, sew the fabric on one side, loosely joining the two pieces until there is a hole for about 20 cm / 8 in left for your arm.
Do the same on the other side for the other arm. (I used the loops formed by wires to run the seam through; worked it loosely to form a soft, lacy seaming line).
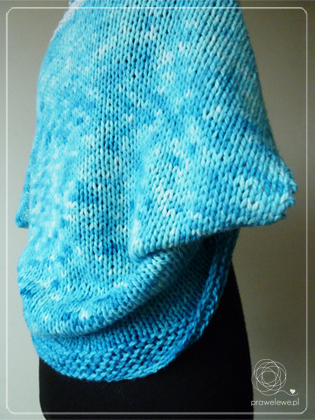
Voilà! Here is your shrug. Is it also teal?
I would love to see what you came up with so please share your photos in my Ravelry group and link your project to the Teal-Snow Shrug pattern page.
~ Cathliin
Leave a Reply